
Mastering is essentially the process of preparing your song, or collection of songs, for the commercial market. The aim of mastering is to present a coherent final product that translates well onto all kinds of listening systems and environments in the real world, beyond the relatively pristine confines of the studio.
In practice, mastering is primarily about fixing troublesome frequencies, lifting detail, balancing and enhancing the stereo image, and of course making the work competitive in terms of overall loudness. Of course, mastering can also involve more than this, but here we are going to focus on the essential processes that can be undertaken in your own studio, particularly when hiring a professional ME (mastering engineer) is not cost effective.
Your Pre-Mastered Mix
The more familiar you are with the mastering process, the more this can help you make good mixing decisions. Mix balance is king here, and so is maintaining headroom and a good dynamic range. Make sure none of your individual instruments or vocals go beyond 0dB where they will clip or distort: Even if your mix overall has good headroom and is well short of distorting, any peaks caused by tracks spiking above 0dB may become more apparent while mastering and severely compromise the mix.
Related
 Korg Revives the Vestax Handy Traxx Portable Turntable
 We Roadtest the New RMX-IGNITE from Alpha Theta
Keep control of your mix dynamics by adding small doses of compression at different stages rather than heaping it on in one sitting, so a little compression while tracking, a little while mixing, a touch of limiting here and there and maybe even a touch on the mix buss itself. By the time you are printing off a mix, those compression touches will add up to a mix that is solid, without being lifeless and have just about the right headroom and dynamic range left that you or your ME would need.
You want to keep your loudest peaks with at least 1dB of headroom below zero, but really you can comfortably aim for greater margins, -3dB below zero would be even better. You don’t want to worry about ensuring your mix is loud – that is what mastering is for. Some engineers are even printing mixes at -18dB because they feel there is some sonic benefit. Your mix file can easily be brought up in level without issue with gain plugins or the clip gain functionality in most DAW’s. What you want to avoid at all costs are peaks above 0dB. It is far better to maintain headroom by printing a quieter mix than to squeeze every possible decibel out of it and risk going over before it even gets to mastering.
A track with good dynamic range feels musical and exciting, whereas a track with poor dynamic range feels tight and fatiguing.
Dynamic Range
Dynamic range is the difference between the loudest and quietest moments in your music, and is also essential to preserve. A track with good dynamic range feels musical and exciting, whereas a track with poor dynamic range feels tight and fatiguing. How much dynamic range you build into any given mix is largely a judgement call you make based on taste, style and genre. Genres like pop and electronica tend to have less dynamic range than jazz, classical and other acoustic music. As a mix engineer you don’t necessarily want a mix that is too dynamic, but you certainly don’t want one that has no dynamics either! Meters like the Brainworx BX Meter that give real-time visual feedback on the dynamic range are popular tools and can help guide you in this respect.
Mastering Signal Chain
There are of course exceptions, and there are occasions where you have to do things differently, but the rule of thumb ME’s tend to agree on would be that a mastering chain should run something like this…
Gain Plugins
EQ
Stereo FX – such as widening or mastering reverb
Compressors
Limiting
Gain
You want to avoid using your limiter to deliver lots of gain at the end of your mastering chain. Ideally you only want to lean on them for a few dB, so make sure your audio file is at a good starting level either by using a gain plugin or, using the clip gain feature in most DAWS. Gaining will not affect your dynamic range only your headroom, you still want to keep enough headroom to apply your processes, but you don’t want the file to be so quiet that you are cranking the limiter to take up the slack.
Phase
Check a phase meter for good stereo representation: a nearly static line down the middle of the meter suggests there is little to no stereo quality; the result can be a lifeless, congested sounding mix. The solution could be as simple as inserting a basic widener and opening it up, fanning the mix out like a deck of cards. This leads to possibilities for additional surgical processes.
EQ is 90% of the mastering process.
Well-known and highly experienced mastering engineer Craig Anderton preaches that EQ is 90% of the mastering process. If you are boosting or cutting EQ, a great piece of advice from Craig is to push the EQ frequency gain to where your ears want it…then halve your move. If you are boosting 3kHz by 3dB, bring it back to 1.5dB, that will probably be enough. In terms of EQing the mix generally, take time to listen first for the obvious things. Purposefully listen to the bass, the mid range, upper mid range and the highs. While trying to detect faults may seem like looking for a sonic needle in a haystack, start broad and you’ll gradually zero in on any issues if there are any. If you can’t detect anything you know you could improve, don’t EQ anything.
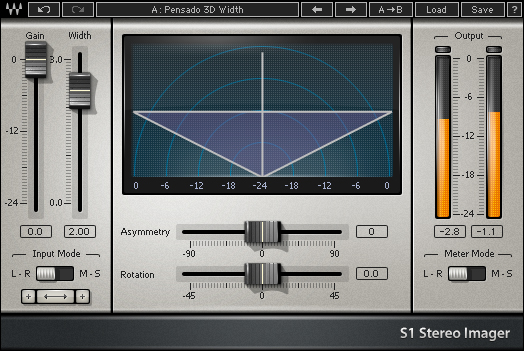
Stereo Enhancement
Stereo enhancement, or “widening”, involves spreading the various elements of a mix out over the stereo spectrum, pushing more sound to the extreme left and right.
This can be a significant and satisfying part of the mastering process, often transforming a track with a single turn of a knob. The downside is that it can also destroy a mix by either creating an un-real sense of space or by introducing phase issues and compromising energy levels.
The temptation can be to widen as far as your plugin will allow, but a more sensible approach is to apply it only to the point where you miss it when you take it out.
Widening to lift detail
Wideners can be especially useful for songs where a certain instrument or the vocal is getting lost in a busy mix. This is commonly because of an excess of information focused in the same ‘space’, either in terms of frequency or panning. Mixes that lack stereo information will be worse for that. Use a widener to fan out the mix, followed by an EQ boost to the fundamental frequency of the instrument or vocal you want more of. Typically you could look at boosting a vocal in the 3-4kHz range.
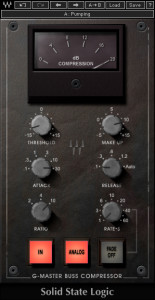
Compressors
Compressors control dynamic range. If the mix is too dynamic or just needs a little more punch, a couple of dB of gain reduction from a compressor can really help stabilise the mix. You’ll need to think in terms of long attack times to avoid squashing the transients. Compression can really help in terms of scoring additional headroom and adding gain. If you are not getting the loudness level you want at the limiting stage, go back to your compressor and squeeze it some more rather than digging deeper into your limiter.A useful technique for achieving strong but transparent compression is to use two compressors in series.
Compressors in Series
A useful technique to keep compression transparent and yet still achieve lots of gain is to use two in series, thus halving the workload on each. You get a cleaner, less obviously compressed sound because the circuits in each are being driven less and recovery times are near instantaneous.
Limiting
The final stage is to cash in any remaining headroom and bring the mix level up as high as you can without clipping. Limiters are essentially compressors with super fast attack times and high compression ratios. You might start by setting the ceiling of a limiter to 0dB and then draw down the threshold to meet the audio peaks. The threshold is tied to an auto gain function, so the more you reduce the headroom and dig into the peaks, the more loudness you get back.
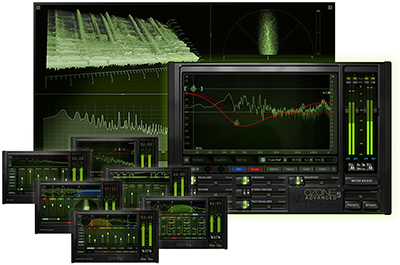
However, there is a trade-off here: the more you flatten the peaks, the less dynamic range you end up with. Mixes with too much limiting may appear loud, but in truth they feel flat, lacking dynamic energy and excitement. The trick is to be careful – a little limiting goes a long way, and heavy limiting very quickly gets ugly and amateurish.
And Finally…
One last point worth mentioning as a word of warning: you could hypothetically set your limiter to 0dB, thereby thoroughly exploiting any remaining headroom, and achieving maximum possible loudness. After all, you would think, if you have a limiter in place, you should be fine right? None shall pass and all that?
Well, yes, but there are certain digital processes that are required to smooth audio and in so doing they can add an additional thin layer of gain after the limiter: this could be enough to clip the master buss if your mix is already running right up to the limit. Therefore, it’s far better practice to allow perhaps 0.5db to act as a super safety net.
Discover more from Decoded Magazine
Subscribe to get the latest posts sent to your email.


